Wednesday, 17 June 2020

Where did the week go?

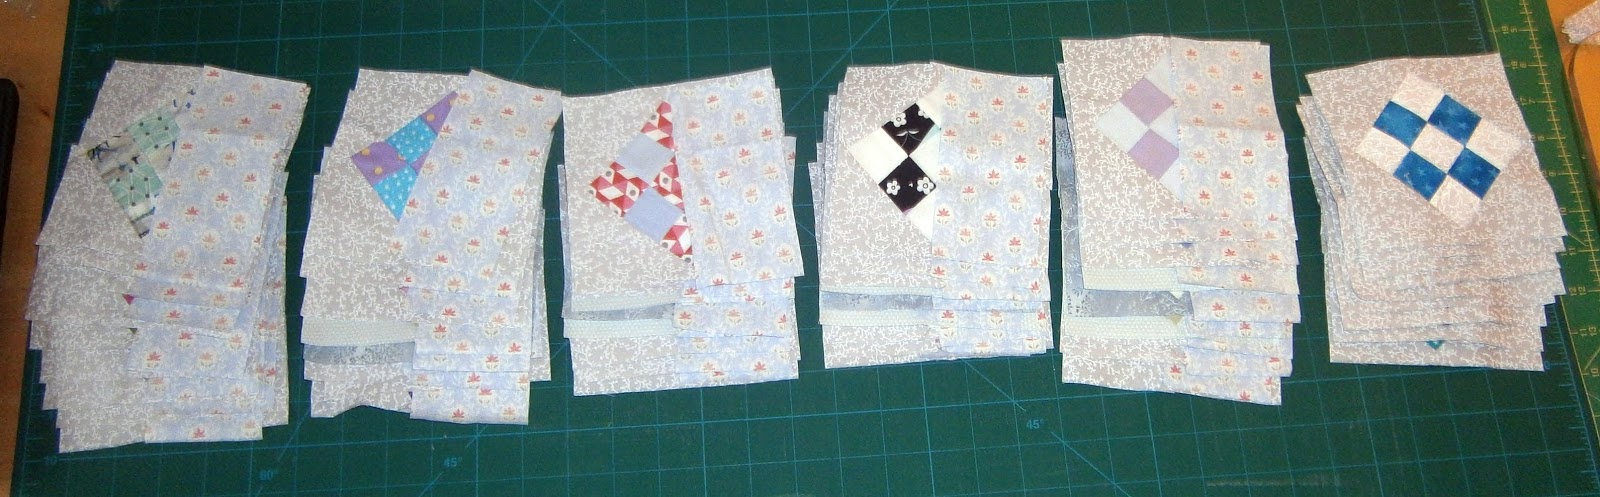
 Do you like this stage in a project too?  Where it's hard to believe that this small amount of neatly cut fabric will, with the magic of sewing machine and rotary cutter, soon add up to a whole quilt top?

For me, it's just as well that I enjoy this stage, as I cut this fabric last week, but have yet to move it on to the sewing stage!

I'm sure that I've been busy, but I think that the home college / school work support and 'domestic duties' must have been more time consuming this week for some reason.
Glorious colour!

I'm not sure that the white background is a truly useful background colour when the size will be a baby quilt, but at least it will be nice and jolly.

I'm looking forward to trying a 'disappearing' shoo fly block with them.  A pattern from 'Turnabout Patchwork' by Mairal Barreu.

I'm hoping to find more sewing time this week!

Wednesday, 10 June 2020

Tutorial - Fabric Travel Pouch / Bag for Masks

 I was thinking through how the masks that I'd made were going to be used.  Some will be used on public transport, taken off (for example, schooling) and then what?  What do you do with your 'grubby' mask?

Obviously you could buy or make a fabric bag to put it in (FabWraps is still open on Etsy and selling bags!) but I wanted something that I could keep clean masks in too - ready for a journey home, say.

So this drawstring bag with pocket was born.  You keep clean masks in the outer pocket, and drop your used masks into the drawstring bag.  When you get home you can drop the whole package into the washing machine.

Genius, if I do say so myself!  So here's a tutorial.  Measurements are for my style of masks (finishing approximately 8.5" x 4")  but I'm sure that you can adjust it for your mask size / shape.
 You need three pieces of fabric and a length of cotton tape.  Two pieces 7" x 14", one piece 7" x 10" (for each bag I cut a 7" across the width of my fabric and added a piece into my scrap bag from the end of it.

Turn a hem on the top of the shorter piece.

Put a button hole in the centre of one of the tall pieces, 2" down from the top.
 Layer up the three pieces as follows with their bottom edges aligned.


  • Right side up, button hole piece with button hole at the top.
  • Right side up, shorter pocket piece.
  • Wrong side up, plain tall piece.
Then sew around three sides - the long sides and the bottom.  I like to reinforce the start, stop and where the top of the pocket it with a 'forwards and backwards'.

 Now turn over 1/4" at the top (and press if liked).
 Next turn over approximately 1.5" to make a neat edge.

This is going to form the channel for your drawstring.
 Sew the channel, less than 1/4" from the folded edge of the fabric, using the free arm on your machine.

Now turn the bag out.  If the pocket looks inside out don't worry - you just need to pull it from inside the bottom corners to make it go the right way round!
 Thread the tape through the channel and knot the ends together.  I used 23" of cotton twill tape, so that I know it it is washable.

Ta-da!  Finished item.

You are ready to load it up with your clean masks in the front pocket, ready for your trip out.
 So, how did I spend my weekend?  Well, this was the batch that I made on Sunday, having done something similar on Saturday (and a few more masks for good luck!).


I hope that the idea is a good one and that it might have some use for you.

And stitching just for me?

More mini homes.  I'm still managing to complete one a day as part of the #100dayproject.

Loving these little bits of silliness!

Wednesday, 3 June 2020

Another Glorious Scrap Quilt Finish!

 Do you ever have one of those projects that just ticks along in the background?

This turned out to be one of those!

Nearly a month ago I showed you these little 9 patch squares.

Then I added triangles to bring the size up a little.

Then trimmed.
 Then had to plan out a layout - taking into account the three different grey fabrics that I'd used for the setting triangles (I'm working from stash, using up smaller pieces!).
 Then pair them up with the sashing that I wanted to use, ready to sew
 Time to check that the lines had stayed where I expected them to stay, before adding the longer sashing strips to complete the quilt top.
 So that happened over the course of the month.

Last week I patched up enough wadding (a total of 27 pieces!) to make something large enough to complete the quilt sandwich.

Once it was basted, it didn't take long to quilt it with a wavy line.  Not too dense, I still want it to be cosy.
 I didn't strive too hard to keep them parallel.  Just close enough to have a relationship to each other.
 Here it is, complete.

We already have a family game of 'choose your favourite' - lots of fabrics that we recognise from other projects!

Finishing at 40" x 60" This one is likely to be a keeper.  It's destined for the back of my sofa for the moment.  I'm enjoying it (and enjoying the fact that I managed to get all the sashing fabric facing the same way - I don't usually choose directional fabrics for a reason!).
 Alongside that excitement there were also a few more of these.
 This time with draw string laundry bags for people on a day trip or (later in the year!) an overnight trip.
And button up pouches to keep the clean masks all in one place.

I haven't made one of these simple 'clutch' bags for ages.  Good to find that they are still as simple to make as I remembered!

Wednesday, 27 May 2020

Scraps, Glorious Scraps!

 I am not the only person in the house generating scraps!

My DD1's business, FabWraps, also generates scraps, which she wants to turn into a Project Linus quilt.

I've been helping her work with them this week.
 I wish that we hadn't left it most of a year until deciding to tackle them!
 I'm teaching Georgie to foundation piece with a short stitch over paper.
 When the square is covered....
 ....we flip it over and trim the edges to line up with the paper.
Then flip it right way up to admire it properly!

You will spot this one in the photo at the top of the post.

It's a relaxing way to sew blocks.  No templates or measuring required, just lining up a few bits of fabric.

Hope that we make good progress over half term!

Wednesday, 20 May 2020

Quilty Finish!

 I've been meaning to make a Carpenter's Wheel for years.

OK, so this is an easy version of it.  Perhaps it's a Carpenter's Star instead of a Carpenter's Wheel - I've never been good at knowing what pattern / block names are, I'm afraid.
Finally, scrap sorting / scrap busting in lockdown has prompted me to take it from the 'one day' list and move it to the 'do it now' list!

I extended the size of it with sashing and blocks of more charm squares (I have no more blue, green or neutral charm squares left).

It reached 66" x 44" which is a good size for me to quilt.
 Shame that I still managed a tuck or two in the back!  I clearly need more practice again!

Pieced backing.  I was delighted to find this peice of 'nummer' from Ikea, which only needed extending in one direction.
 I thought that I'd got enough grey left to bind the quilt, but I was wrong, so it has a brighter binding than I'd been intending, but all from stash, which is a good thing, and quite cheery.
 Alongside my quilty finish there were another couple of batches of these.
This batch made with cord elastic rather than flat elastic - all that I could get for the price I wanted to pay / in the time that I wanted to get it.

Happy sewing, everyone!

Wednesday, 13 May 2020

It's all about the....

 .....mini homes?!?  No, not really - although I'm on day 37/100 on the #100dayproject - and I'm very happy with how the neighbourhood is shaping up!  I'm still having fun using different techniques and colours to make these little jewels.  Some more complex than others!
But the rest of my sewing?  I've bowed to the invitable and made masks.

My version is a triple layer (quilting fabric outer, breathable  non woven polypropylene middle, and a soft cotton jersey by the skin.


There is a pipe cleaner sewn into a channel at the top so it can fit closely around the nose.

Different fabrics for different family members.


I 've tried to make it as easy as possible to put on and off.  It has a long length of elastic and a cord toggle to make wearing and adjusting them straighforward.
 They are made in two sizes - teens and adults.
I shall make them for my (extended) family, and then stop.  Already I've had to order more elastic and more cord toggles.  Thank goodness for all the people who are still working in the companies that provide these items!

Wednesday, 6 May 2020

Sending a Hug

 After a second elderly relative said how much they were missing hugs, we decided to take action.

Two metres of plain fabric, about 20" deep, a Sharpie pen colour chosen by each member of the family, and a dry bit of cardboard to keep the fabric clean and dry (more or less!).

Then each of us lay down with our arms stretched out and were traced around with our pen colour.

Sentiments and signatures added.
 A second, petterned, fabric sewn on, turned through, top stitched.
 And there you are, a hug in a stole (rather than a stolen hug).  Now they've been sent (and received!) the recipients can have hugs as tight as they like for as long as they like.

Of course I know that it isn't really the same.  But we've shown three people that we are thinking of them and raised a smile or two in the process.
My next project was to tackle my 'leaders and enders' nine patches.  Each one finishes at 3" square, so I tend to do something else to bring the size up a bit in order to make a bigger 'something' from them.

More on this next week, I hope!

Wednesday, 29 April 2020

Mini Tutorial - Floating Hexies

 I decided that I wanted to make something simple - and this is based on the excellent pattern in Pam and Nicky Lintott's 'New Ways with Jelly Rolls' for a quilt back.

Too good to hide away on a back, in my opinion!
 So I've made mine with just two fabrics.  One for the hexies, one for the background.
You need to cut 4.5" strips x WoF.  I cut four strips for the dark purple, and seven for the background.  You need to add extra half hexies at the ends which is why you need more background shapes.
 Then use your 60 degree ruler, and use the lines between the 8" and 3.5" lines to cut the half hexie shapes, flipping the ruler round after each cut to be as economical with the fabric as possible.

Next sew them together to make strips - you can see below how to create the hexagons from two strips.

I planned a 3 - 4 - 3 layout.  Once you lay them out you can see where to add the extra background half hexies.
 I liked laying mine out to make sure that I'd got the right number (facing the right way!) in each strip.  You can see here that I was part way through the process and needed to add more sections at some of the strip ends.

When you are happy with your strips, line them up and sew together.  Work out where the hexagons are going to be to work out how each pair of strips will line up.

The ends will look something like this.

You need to cut them off to make a straight edge (generating more scraps to play with, of course!).

That's it.  You have made enough for a runner, perhaps.  Mine finished at 54" x 24".  If you made two it would make a good lap quilt or cot quilt size.

What I actually went on to do was to add deep borders around my central part, before backing / basting / quilting / binding.

The quilt finished at 70" x 46" which is a reasonably useful size for cozying up under.

The backing was a bit random.  Life saver rings and another fabric with a flash of red on it.  Not a bad combination, but perhaps not the best players with the front of the quilt!  Sorry, whoever ends up with this one - but it was sewn with love if that counts for anything.