Wednesday 23 February 2022

Christmas Crown Tutorial

A rack of hats? A millinery of hats? A fascination of hats?  Choose your own collective noun! 

What I actually have is a dozen hats ready for Christmas, as we're moving away from Christmas crackers.

Time to write an outline tutorial, in case I find that I need to make some more!

The basic pattern is based on a sheet of A4.  To make your own, cut a 5" strip of the longest length of your A4 paper.

Fold a 1/4"  for a tab overlap at one end, and then fold the rest into quarters.  Mark 4 points for the top, and draw a line at 2/5" up the strip, and join the top points up with the line with 45 degree lines to make the crown shape.

You will use the pattern piece twice, ending up with a shape that is roughly 23.25" long and 5" tall, with 8 points and a tab at either end.

I drew round the template onto interfacing and interlocked the patterns (with a slight offset at each end so that the points interlocked).  I made six pairs.  It's economical for your interfacing and fabric to do this.

Next I ironed the interfacing onto  the wrong side of one of my fabrics, keeping the pair together.

Then, layer up with the second fabric, right sides together.

Sewing next!  Sew 1/4" in from the drawn lines, sew around the two hats, leaving a generous opening to turn through open along the plain edge of the crown.

When sewing around the 'tabs' I made one closed and one open.  Once the crown is turned through you can then turn  under the edge of the open one and slot the closed one into it.  It makes it quite easy!

Once the sewing is finished, cut the hats apart down the drawn lines.

Then trim off the points and clip the valleys, being careful not to snip through the stitching.

Settle down for a few minutes of hat wrangling, turning through to show the right sides of both fabrics, and poking out the points as well as you can.

Once it's turned through, it's time to slot those tabs together and make the flat shape into a round crown.

I might also iron the creases to make sure the seam over the turning gap stays neat.
Time to top stitch now!  

I start by making a row of stitches down the tab, to join the crown ends together.  Then top stitch around all the points, stitch again down the tab, and then along the bottom of the crown, which will sew the turning gap closed.
Done!  Repeat until you have sufficient for your needs.

I did also make one with a ribbon tie (sewn in at both 'tabs') so it could be a variable size, but after trying the sewn version on a variety of head sizes, I decided that I didn't need to do that.

I was going to decorate them with sequins and beads, but decided that I'd rather be able to wash and iron them easily!
 

Wednesday 16 February 2022

Nine Patch Fun!

A surprisingly fast finish on this!
My usual Bernina sewing machine had to go in for a service (she was a bit grumpy about missing her service last year!), so I was going to be using my second machine - which is lovely to have, but much noisier and full of vibration than my lovely Bernina, and without great things like the 'needle down' button!

I wanted to carry on sewing, but with a project that wasn't too demanding of accuracy, whilst I got used to the machine again.

So, lots of chain piecing, as you can see.  Lots of short sashing pieces here, swiftly followed by the longer  sashing pieces.


Then it was time for borders, backing and basting.
Back to the machine for quilting,  and I'm pleased to say that the Bernina was home in time for putting on the binding.


I'm not sure that the backing is entirely right for the tones in the front of the quilt, but it had the absolute qualities of there being enough of it (thank you Benta!) and it being right beside me in my craft room!

So, 'Up the Garden Path' is finished.  At 58" square its a decent size to keep on the sofa for warming feet or more when the weather isn't quite as warm as you want it to be coming in to spring!

I hope to gift it to an old friend in the not too distant future.
 

Wednesday 9 February 2022

Another Vintage Tile Complete!

Completed!  My second version of Vintage Tiles (pattern by Lou Orth).  This is the one with the blue 'echo'.
This time the quilted motifs in the centre of the blocks were trying to be waves - a bit like the classic Japanese wave print, but not so accomplished!

This is the one in the centre.

Simpler ones in the remaining 8 stars.


Bound with the plain blue from the echo.

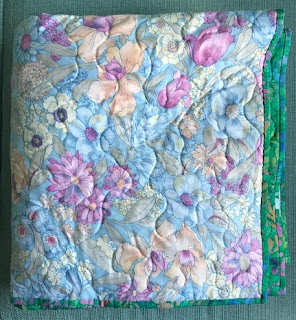
Backed with two floral prints.

Now to be hidden away until I decide it's the time to reveal the quilts to their intended recipients!


Wednesday 2 February 2022

Small things.

I've been building a stack of 'leaders and enders' nine-patch blocks.  Each is 3.5" square when unfinished like this, so will end up at 3" square within a piece.

I've just counted them, and I have 48 in total.  One more and I'll be able to make a square quilt with them!

I've decided to use some plain green fabric to float them in.  Here I am cutting all the setting triangles - they are a generous 5" square, then cut in half.

Making them from yardage rather than scraps makes it a quick job!

The actual sewing will take longer and will probably slotted around other projects.  Excellent mindless sewing!

I've also been experimenting with a template for masks that are shaped, rather than my usual design which is based on a rectangle.

These are for DD2. DD1 is happy to stick with the rectangular ones.

Always plenty of projects to be getting on with - I've also made (but not photographed) a heap of mini Christmas trees, ready for a workshop in November.  Nothing like being prepared!