Wednesday 28 September 2022

Tutorial - A5 pouch

Need to make a simple pouch like this for A5 papers (or A4 folded in half)? Here's how!
Start with:
      1 x 7.5” x 21” fabric (outer – avoid directional prints)     
 1 x 7.5” x 21” fabric (lining)  or you could use just 1 x 7.5” x Width of Fabric (inside and  outside will be the same).
   1 x button or snap fastening.

How to make.
  Cut your fabric, and lay right sides together.
  At one of the short ends,  measure 1” each way from one corner, mark a diagonal line between them, and cut off the resulting triangle through both pieces of fabric.  Repeat for the other corner at that short end.  This will form the shape for the flap.
 Pin if desired and start sewing the two pieces together using a ¼” seam allowance, starting about half way down one of the long sides. Sew almost all the way round, but be careful to leave a gap of about 3” to turn the pouch through.

Clip the excess fabric from the corners and turn through.
  Press neatly.
 Top stitch along the straight short edge, 1/16” from the edge.
 Fold the straight short edge up 8” to create the pouch and pin. (if you are confident with the positioning you can add a button or snap to the straight edge before you do this).
  Starting at what will now be the bottom of the pouch, top stitch, 1/16” from the edge in one continuous line from the bottom of the pouch, right up and around the flap and down the other side to the bottom of the pouch of the opposite side.  You may wish to ‘forwards and backwards’ to reinforce the start and end of the stitching, and perhaps at the top edge of the pouch too.  This top stitching not only forms the pouch sides, but also seals the gap where you turned through the pouch.

 OPTIONAL: Measure a line 3” up from the edge of the flap and sew across this line.  It will help the flap to hang neatly but isn’t definitely required.
  Make the correct size button hole at the appropriate place on the flap, then sew the button to the pouch OR add the second part of the snap. (Just for information, when I make these I put one button in the middle, 1” to 1 ¼” from the top edge of the pouch, and the button hole 1” up from the lower edge of the flap).
Admire your lovely pouch!


Wednesday 21 September 2022

Starting a new quilt

A quilting friend gave me some of her scraps. Lucky me!  I've cut them into the sizes that I commonly use, and have decided to use some of my 3.5" squares to make a simple quilt.
Sashing them with black is an unusual choice for me - I love the look but find it difficult to sew on sometimes.

Inside the quilt the sewing is all with white thread - easy to see and unpick if necessary!

After sashing was added on one side, I'd add a long strip / sashing to the top of the pieced, then it was ready to add to the quilt top.

It is based on an idea I saw on Pintrest, but I don't often make quilts with the blocks on point, so it's making me have to think about it!

Here is what I have so far, laid out on my 'design bed'!

Still more to do!
 

Friday 16 September 2022

It's been a while.....!

I can't believe that it's two months since I last blogged!  

Not a lot of sewing since then - it's been the summer holidays, and I've also moved from my previous sewing space to a smaller one, which took quite a lot of energy!

The sewing things are all in the right place now (more or less) but my books and items relating to other crafts are in a different space and still need to be sorted out properly.  This will happen over the next few weeks.

So, what sewing have I done?  Well, there was this 12" block, which will be added to others made by my quilting group to make a group quilt.  This one was with a disappearing technique. and started with two 10" squares, but needed a border to bring it up to the right size.

I've also refashioned an item of denim clothing for another quilt group challenge.  This was a skirt, and you can see that I haven't done that much to it to re-fashion it as a beach bag that DD2 is looking forward to using next summer.

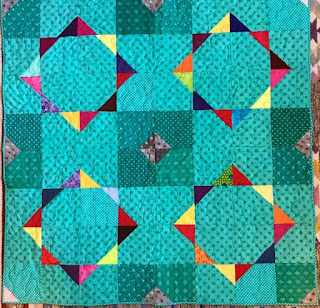
Finally, I put together blocks that a fair number of us had made from my quilting group, then finished the quilt and entered it in the Kew Horticultural Show.  We were pleased to win Third Prize!

It's a cute baby quilt that will make a lovely donation.

Not oodles to show for the summer, but lots of lovely memories with my family, which are more valuable than anything else!