Tuesday, 23 April 2013

Elated by a finish!

 At last!  A finished quilt!

Ok, so it's quite small, but it is the first 'finished item' on my C&G course, so it had lots of attention paid to it as I was designing, constructing and quilting it!

The quilting is dense, but I'm delighted to say that 'Radio' hangs flat, due to some blocking / damp stretching.  I'm also glad to say that it seems happy to hang from the radio aerial that I'd purchased in error last summer.
 After it was finished I decided that it was time for a sort out of the craft room / study.  I've managed to turn it from this....


with boxes, bags, and all sorts of things piled one on top of the other.....


 .....to this, with a bit more floor space on show, a bit more shelf space on show, and a fresher feeling to the room.


 There is still a bit of moving to do - an old laptop, some of the girls' old school work and some extra wadding that belongs up in the loft, not in this room.

I think that the school work proves that I haven't tidied up properly since last July.  That's quite poor, even for me!

The next job is to cull the quilt books which are threatening to get out of hand (again!).

At least with this job done I can get on with some sewing again - much more fun!  I'll be able to finish one or two things that I discovered fabric for during the tidying up process, of course!

Wednesday, 17 April 2013

Funny Bunnies (and cake!)

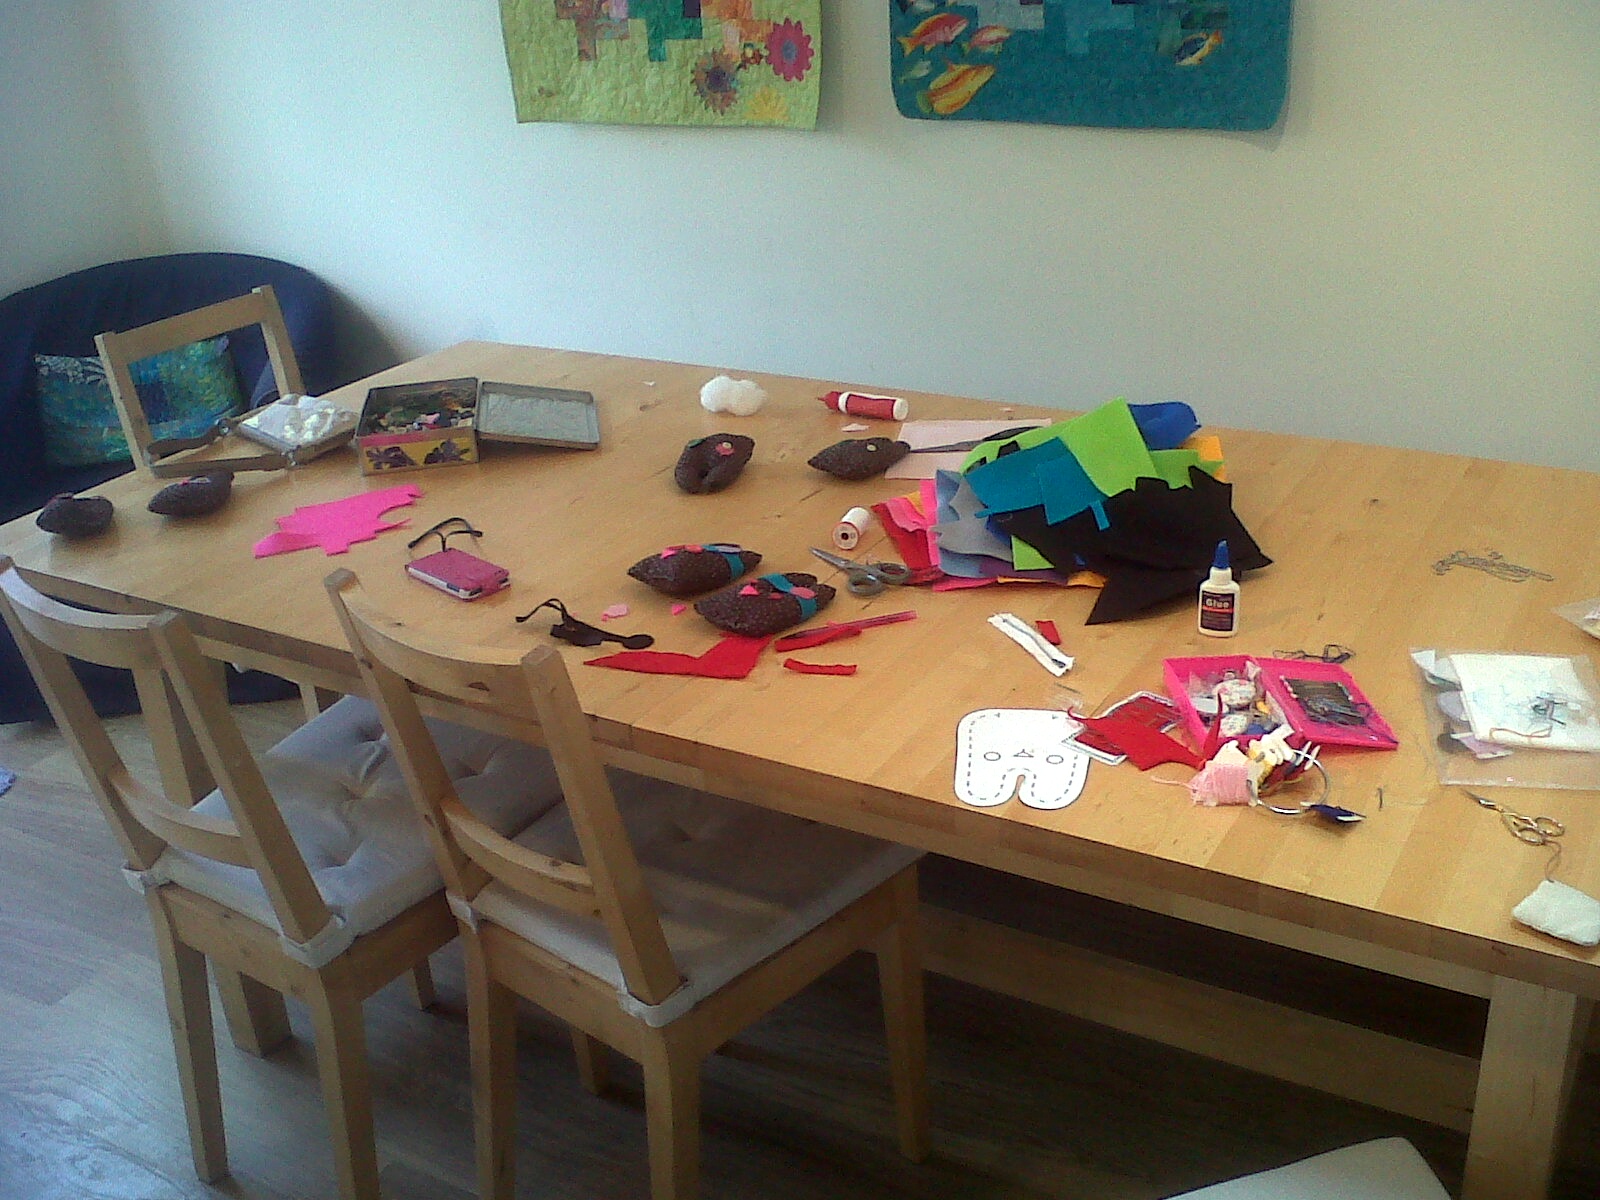
 Without too much help (well, I sewed around the basic shape on the sewing machine) the girls and a few of their friends made these Funny Bunnies.  It was a fun activity.  Not too much prep, but access to my button box and some felt gave us a good time making and naming these little stuffies.


You can see my paper pattern - it is free from Urban Threads under their Freebies section.  So far we haven't made any for leaving in the library / at bus stops or wherever. 


We thought that we'd better keep our first attempts, but will make them again, perhaps in fleece, for passing on to others.

It was another week for cake making - this time for the birthday party (yes, a swimming party, you've guessed it!).  An easy one to decorate this time, with the use of Playmobil swimming figures and 'fishy' jelly sweets.  I have to be honest, the making of the cakes inside would have been easier if I'd waited until the shopping delivery - as it was I ran out of 'normal' flour and had to add some substitute to the vanilla layer.  I'm pleased to say that using a yeasted bread mix didn't seem to detract from the cake, though, and it still tastes fine (and wasn't too leaden either!).
 
This week my DDs are back at school, and I'm hoping to spend time finishing my C&G wall hanging.  Photos next week, perhaps.
 

Tuesday, 9 April 2013

A Whole lot of Samples

Not really much stitching going on over the Easter hols - but I did make this folded star block last week.  Wish that I'd remembered my ruler and made it a bit more accurate, though.  I can't decide whether to make another one, this time trying a bit harder to make each round completely even and accurate.


This box was a small caddy made from some other samples- panels and pockets put together, experimenting with some ideas.
And this is what a FQ of fabric looks like once you've cut it into a spiral and crocheted it back up into a piece of something - with this size hook it produced a piece that was quite firm but still bendable. Interesting texture, and it would be nice to see what it was like with a bigger hook.
 
I've only got a tiny bit of work left to do on my current C&G module, apart from completing the wall hanging, which has got quite a few more hours quilting still needed!  I'm sure that I'll get to it once the school holidays have finished!
 

Tuesday, 26 March 2013

Windows and cake!

I finally finished my Cathedral Window sample this week.  It's only 12" square, but seemed to take quite a long time to construct it.  I guess that the benefit is that once you've stitched it, it's done - no need for backing or wadding as it already has a finished back and sufficient layers to be heavy / warm!

Of course, me being me, I have had to look up different methods.  As much because I want to use this type of effect (well, the effect of a single block, rather than the sixteen in this sample) on bag pockets where I won't want such bulk, as to find a faster method.

I've found two methods that are similar, that leave you with an unbacked / unfinished block - perfect for what I wanted.  I shall spend some of my sewing time this week making these as samples too.  This is one of the methods
 for faux cathedral window blocks using a large square in the middle.  The other method I found in a magazine called 'Bags, Beads and Brooches' by Nina B and uses 4 small squares folded in half diagonally and sewn onto the four background squares to make that 'square within a square' pattern that can then have the bias edges rolled back around a 'window' of focus fabric.   Lots of fun!

The other fun that we've been having this week is to celebrate DD1s birthday.  Can you guess how old she is?  (Can you guess how old I feel?  if you've guessed anything over 88 you are correct.  It turns out that even if you aren't having an actual party, just a few friends around for a birthday tea, it can be quite noisy and tiring as a parent!).

Now I just need to gird my loins (metaphorically.  In reality I need to straighten out my back, hips and right shoulder!) ready for the excitement of Easter and the school holidays!

I did laugh yesterday.  One of my DH's colleagues swears blind that she won't be laying a trail of chocolate eggs on behalf of the Easter Bunny this year, like she has every other year.......her daughter has just turned 20!  Looks like I've got a lot more years of Easter surprises than I'd thought ahead of me!

Hope that your spring isn't too chilly to have fun.  Happy Easter!

Tuesday, 19 March 2013

Textile Bravery!


These little 'fluffies' were the result of  a mini needle felting workshop given by Hilary, one of my quilt group members at last week's meeting.


Of course, DD1 looked at it over breakfast the next day, and got very excited as she thought that she'd be allowed a go too.  Gulp!  A frisky 9 year old and a very sharp barbed needle being stabbed up and down a lot....what could possibly go wrong?  I decided to be brave, spent £15 on eBay, and became the proud owner of these lovely colours of wool and 5 felting needles.


By Saturday I was brave enough to allow DD1 (right) and one of her friends, and their younger sisters to all have a go at needle felting!  They were great - imaginative and focused.  Yes, we did need one plaster.  Yes, 3 out of 4 claimed to have pricked their finger at least once.  No, it wasn't as bad as I thought it might be!  My bravery was rewarded!

These are just some of the items that they produced - we also had trees and another egg or two, in addition to the rainbow scarf, glasses, and all sorts!  A couple of brooch backs were added, and a good time was had by all.  I think that the girls were pleased not only that they'd been able to make some lovely items, but that there was yet another craft that they hadn't realised existed before!

My next bit of bravery was to experiment again with some hand dyes.  Once again following on from the quilt meeting, were I'd talked to someone who said that she washed all her hand dyed pieces together in one wash, not finding the need to separate them by colour family when she was rinsing / washing them.  I used the last of the dyes that I had mixed last week and set up a range of colours.  After about 36 hours I slopped them from their plastic bags and into the washing machine - all in one load with a couple of colour catchers - and pressed the 'start' button.

These colour catchers show the progression of 'loose dye' reduction - but it took five lots of 59 minute washes to get to the bottom pale blue.....so still not completely free of loose dye, but well on the way.  I'm not sure that I'm desperately comfortable with the amount of resource that it takes in order to dye this small amount of fabric, but at least I know that there is an alternative to the (for me almost impossible) tasks of rinsing / washing separately by hand.

My range of hand dyed FQs looks like this now - it must be time to stop admiring them and start using them!
I realise that these are only tiny braveries, insignificant in the world, but they make me happy!  Hope that you are having small happinesses too!


Tuesday, 12 March 2013

Fabric to Dye For

I finally did it!  Many, many years after buying Helen Deighan's inspirational book 'Dying in Plastic Bags' I finally did do some dying in plastic bags (and a few bits in a cat little tray too, for good measure).

This is probably my favourite piece - reminds me of Japanese screens - very simply pleated and stuck in a bag with the next two bits shown here.
I thought that I should include a 'sunburst' (a 10p piece and five elastic bands to make this one).
 This one was loosely scrumpled with two elastic bands around it.

Isn't it great that these pieces were all in just one bag of dye?  I'm really pleased with the different effects!


The colours above are just to give you an idea of what my other bag dyed pieces looked like - lovely mottled dying, which is just what I wanted.  Luckily for me they are easy to achieve as it means that you have to work them less rather than more.  I don't know why I can't put this text beside them, though!

I found the whole rinse / wash part rather too taxing to do by hand - so used the washing machine to do lots of it.  A rather nice bonus was this array of colour catchers, which I'm looking forward to using.  I confess to a niggling doubt about whether or not all the spent dye has been caught, though, as I didn't have enough time / colour catchers to get to the point where they were coming out white.....

An interesting conversation at my quilting group last night, though, where I was told that if the dye was spent (so after 24 hours from mixing with the salt / soda to be sure) I should be able to wash all the pieces together, rather than in colour sets.  I feel a little more experimentation coming on (although I only have a limited amount of the white fabric for dying left at the moment!).  If it works I might do more dying in the future, otherwise I'm going to leave it in the 'too physical' pile and move on with other things instead.

Hope that you are having a lovely colourful start to spring too!


Tuesday, 5 March 2013

Flaming Dragon Hen!

Should I really be posting my laughable silk painting samples?  Oh, alright, just so that you can learn from my experience, you understand.  I thought that you'd be interested to see how this latest 'fabric colouring' for my C&G turned out.  Interesting, even if it wasn't quite how I expected it to be.

My two top tips for any other inexperienced but aspiring silk painters are as follows: 1) make sure that your gutta line is 'secure' (so that it fully encloses any area you want enclosed) and isn't so thin that you can't see it when you are painting (!); 2) don't spray so much water on to the silk that it bridges the gutta that you so carefully applied!

I'll try to remember this next time I have a go (after all, I still have half a large scarf to use!).


This second piece worked slightly more as I'd intended....but I've still got some way to go until I'd say I was completely happy with what I was doing.


 The rest of the week I've been sewing C&G samples.  This hexie pattern by hand, and then applied to a white background.
This prairie point tree was fun to make - although I'm not sure that the tiny one at the tip of the tree does anything for it!

Away from my C&G course samples, I managed to finish this.  I decided to make a wall hanging from these workshop sample pieces - the dense quilting around the faux trapunto roses meant that any quilt that used these blocks would be a bit too stiff to be cosy.  Although Ferret had suggested that it was possible to beat the bend back into heavily quilted items it all sounded quite physical - not up my street at all!

I opted for a simple zig zag around the edge, topped with a frame of large ric rac.  I think that they look rather like postage stamps now. 


It isn't a quick process, the micro pebbling around the top rose took me almost four hours, I think, but it does give satisfying results.


Off for some much slower hand sewing now - I need to get something done on my cathedral windows sample now.  Of course, I might have hoped to watch TV whilst I was doing this, but I would be unlucky today as it appears that DD2 has hidden the remote control on her way out to school.  Parenting top tip?  Don't start bickering with small children who are holding even smaller bits of technology if there is a chance that you'll want it before school comes out!  Thank goodness for Radio 4, my standard daytime companion!

Wednesday, 27 February 2013

Spring and Biscuits

Not the delicious type of dunk in your tea biscuits, but these - a type of quilting that I have hitherto avoided, and having make this 12" sample, plan to avoid in the future too!

I'm not sure why it's called biscuit quilting, but I suspect that it's to do with the US baked good that gets served with gravy at meals in some parts of the US...... Maybe someone out there has more knowledge than I do about this.  Anyway, it's a style of 'quilting' that involved big squares of fabric pinned onto small squares of fabric, sewn around on three sides, stuffed and the sewing completed before being joined to similar units. 
Not really my thing, although I suppose that on the whole I'm happy to have tried it!
Do you remember that I started this little tile a while ago?  Looking very spring-like it now appears on the Patchwork Meadow site (if you look at the bottom of their page you can see where it says 1 of 15.  Click on the >> and admire all the patches.  Mine is currently on page 11 at the bottom  You can vote for a favourite if you can choose one - there are lots of lovely tiles there!).  I am quite pleased with how fresh it looks, although I am now wondering if I should have tried something more adventurous design-wise!

Nothing else finished this week.  I've got various sample blocks in various unfinished states and I'm still working on finishing the faux trapunto quilting, so I don't feel that I'm missing out on sewing at the moment, just on concentrating long enough to finish anything!  I'd like to blame a problem with my back, but although I means that I've been pretty uncomfortable, I have been repaired well enough by my lovely osteopath that I can use the sewing machine again, which is good news!  Perhaps I'll manage to finish something soon!

Hope that you are feeling spring-like and getting on well with any projects that you have.

Saturday, 23 February 2013

Starting Faux Trapunto


I was lucky enough to be able to take a workshop with Ferret through my quilt group.  We were taught three different methods of faux trapunto (well, I guess one method with three different versions).  These are what I produced during the day, courtesy of my little Singer Featherweight (great for FMQ, light enough to take to a workshop - I feel a bit bad that I don't use her at home more, but I have my Bernina set up permanently in my craft room, so there doesn't seem to be any real reason to.


The first sample is the one that's closest to being finished.  The base is ordinary wadding sewn around and cut back to the rose shape, with a full layer of batting underneath.  I've added a stipple in blue, with a micro stipple (unfinished), in white.  The second sample is made by sewing the rose shape through a layer of turquoise felt which is then cut back and re-sewn over a full layer of ordinary batting.  I haven't quilted around this one at all yet.


This sample (probably my favourite) has a layer of batting sewn through and then cut back to the rose shape, before bright pink felt (and I mean bright!) was used a full layer behind it.  Still unfinished, but I really do like the tiny pebbles around it, time and thread consuming though they are.  The stitching leaves sufficient holes that the pink shows through (note to self, use a finer needle in future if I don't want quite such a pronounced effect, or when I'm going to be sewing on the silk mix.  This was a 'Universal' but I'll probably want a 60 or similar).  I'll try to finish them properly in the next few weeks and show you the finished item.

Thursday, 14 February 2013

Colour Play


The lovely Avril ran a transfer dye workshop for our quilting group this week - a brilliant chance to dabble in using the papers that she'd prepared for us by ironing them onto poly-cotton pieces.


These are just a couple of the dozen or so pieces that I've created this week, using a few  extra bits of paper that she kindly let me bring home  One of my favourite things was using bits of paper as a resist, but then being able to use the 'resist' for colouring something on the next piece.  Or things like the effect on this piece (right) which uses purple strips which have previously been used in a paper weaving transfer, so have different depths of dye left on them.....
 

Almost endless possibilities!
 

I haven't got any transfer dyes at home, but I have got transfer dye crayons, which had been stuck at the back of the cupboard for more years than I cared to think.  I got them out too, and used more bits of poly cotton to create some fun bits of fabric.
 

This bit is probably my favourite so far, as I can easily see how I could make this to a size that I wanted and then embellish it with beads and hand sewing.....  Although I might pay a bit more attention to which colours were going where!

Wednesday, 6 February 2013

Fall in love with these!


Isn't this gorgeous?  Difficult to see the shape properly, but you can see the beautiful fabric, can't you?  This fabuous bag is from my endlessly talented friend Avril, who has a second blog, 'Embrellish' where she talks about the bags, buttons and brooches that she makes to sell.
 
And this lovely brooch?  Another beautiful gift from the lovely Avril.

Hop on over and have a look (and then seek out 'Embrellish' on Etsy if you'd like to buy or commission something).  Alternatively, if you are local to Twickenham check out the library 'glass shelves' to see when her work appears, which I'm told it will be doing soon.  Buy something for yourself or a good friend, or drop heavy hints in time for Valentines day!

And this is what I've produced this week - my final sample to support a wall hanging design (yes, I'm back into the swing of my C&G again!).  Made in a silk mix, lots of greys, lots of different quilting patterns / applique styles.  Module 6 submitted this morning, so planning for Module 7 underway this afternoon.

It will all be fitted in around school holidays and other high days.
Quite a lot of hand work in this module, so I hope that my fingers behave themselves  as the samples required look like fun, and a bit different from what I usually do.
 

Thursday, 31 January 2013

Can Spring be far away?


Or at least, can we pretend, just for this blog post?  after all, I have got the start of a daffodil to share with you!
I was reminded by Kate North 10 days ago about the Patchwork Meadow project.  They are encouraging people to make a textile 'tile' of 15cm square showing a wild flower.  THe project is to encourage people to think about wild flowers across Europe.  I heard about it some time ago, but it never actually reached a written list, so I'd forgotten about it!  Kate's prompt was perfect to remind me to start something, at least!
 
I used my stitch and burn technique over a sketch that I'd make (you can still see my blue wash-away lines on this photo, but I've sprayed them away now).  I'm planning to add hand stitching to the block to complete it, but I'm pleased with this as a start point.
 
I've cut my foam board ready for lacing this over when it's finished - I just need to plan the hand stitched part of it now and get on with it.
 
Last night I didn't hand stitch anything - but spent the evening papercrafting with friends.  They were very productive, and as we had a heart theme we are all well on the way to being prepared for Valentines day!  No photos, as I didn't remember to get my camera out.
 
Fingers crossed for this mild weather continuing - our feathered friends are now out in the their coop / mini run (although not the open run yet, we want them to know that the coop is home!).
 

Friday, 25 January 2013

The Same but Different


The same but different?  That's right.  Behold a crop of C&G samples (the edges have different techniques to finish them, and there will be more hanging systems demonstrated soon too).  Not desperately exciting, but an easy way back into thinking about my course, rather than worrying about not having done very much for the last two months!   I shall use them for small hand embroideries, I think - but I have no idea what will happen to them after that!
 
 
More 'same but different' - this time a set of three post cards for a birthday swap.  I used my 'stitch and burn' technique to create the applique hexagons - not at all traditional - lots of fun!  Then I couched some threads to give a bit more texture and interest.  All good fun!
 Lastly, for the curious, I did finish the tiny purse - but I can't say that it's a great success.  Open, like this, not too bad (and I'll confess out here in public that I couldn't manage to stitch the linings in - they received the full force of a hot glue gun to keep them in place - please don't throw me out of the stitching Brownies - I'll try harder next time!).

Closed, though?  It's just plain ugly!  I need to use ribbon and a zip that go together, I need to use brighter 'cover' fabric, and I need to replace the nylon not-that-nice zip with a metal one (which will have cotton sides and so be easier to stitch through, I hope!).   I'm not down hearted, but it is an ugly little thing, so I've resolved to try again at some point and to do better!
Plenty more stitching things to get on with (I managed to make a quilting 'to-do list' for 2013 which doesn't include the half-square triangle blocks which are lurking next to my sewing machine, oops, so need to try again with the brain engaged).  Plenty more design things to get on with too, as I'd like to get my current C&G module finished before half term arrives - and I need to re-learn what I've half learnt and forgotten from my GIMP classes in order to move some of what's in my head onto the screen!
 
Happy Burn's Night, one and all.  Nearly time for my (veggie) haggis with neeps and tatties


The Same but Different

Wednesday, 16 January 2013

What do you think?


So what do you think?  What chance have i got of finishing these items and ending up with a cute little zip purse (and when I say little, I mean tiny - it might be big enough to hold a single ring so long as the ring isn't too big!).  There are some lovely 'macaron' purses on the web at the moment - like the ones shown with this tutorial at craft passion.  Perhaps I'll have a finished purse to show you next week (or perhaps I'll have decided that tiny stitches are too challenging to make a neat job of!).
 
If you've got a few moments spare, rather than taxing your eyes and fingers with unfeasibily small purses, why not go and vote for 'A Gift of Quilts' in the Epic Awards?
I didn't join in with this project to make these larger quilts, but I took part in a project to try and make an A3 sized pennant for each competitor in the Olympics / Paralympics last year - and as I don't think that I ever showed the pennants on this blog (and to be honest, I can't find a photo of the third one that I made!) I thought that I'd show them now.
 
Anyway, if you'd like to vote for the project and the way that it encouraged people to join in, then please scroll down this page until you find 'A Gift of Quilts' (fourth line down, right hand side) and click on the hand to give a green 'thumbs up'.  If you like you can entertain yourselves by doing that every day until voting closes on the 30th January - you are allowed one vote every day!