Wednesday, 15 June 2011

Another UFO Completed!

 We all have projects that hang around for a bit, right?  So what's your oldest project that you have maturing?  I decided to try and tackle some of mine over this year - I was surprised by how many I had when I actually looked at was was around.

This one of mine - notable because it's been on my 'design wall' (really vertical storage for odd blocks and small quilts destined for other homes) for some time.  In fact, 'some time' should really be quantified.  Really, in this case, 'some time' is in fact 'some years'.  I think that I made the central part of the hanging was made in 2007.  Certainly as soon as I got my 'Quilting Caveman Style' DVD from Ricky Tims. 

Still, now, the second of my pair of quilts is finished, a mere two years after the first one, and four years since I started.

 So did I try to quilt them to make them match?  Crikey no!  The first lily (blue background) was very heavily quilted.  Lots of dense stitching and trying out of freehand feathers.
 It's only by chance that the pair have come out at such a similar size.  I guess that was the benefit of keeping all the bits for the project in one place, and having at least partly made the wonky block borders before I put the project aside.
The detail of this flower shows slightly lighter and looser quilting. This is the densest quilting on the hanging this time.
Aside from this excitement, I've been hand-stitching on my 'Roses from the Heart' bonnet, doing a little light luceting (aim: to be able to lucet a neat cord without needing to look down).  Oh, and making a few more lavender bags.  Now that my 'projects to do' list is down to 7 (or at least, just the 7 that are already started) it was clearly time to indulge in a little retail therapy.  I bought this pattern for four cushion covers - another 'Don't Look Now' pattern - and some pastel FQs to make one or two of them.  Pastels? Me?  I know.  Clearly not in my usual 'the brighter the better' mood, but I suspect that these will become gifts and I do understand that not everyone shares my taste.

Thursday, 9 June 2011

Giveaway!

 I've just finished the quiltlet that you see here.  It's turned into a narrative piece - hills, the girl about to climb up to the little house, the tree.  I made it as a 'Stay at Home Round Robin' hosted by Kate North.

However, I made it using colours that I'm not so keen on, just to see how it went.  Unfortunately, although I like the form of the quilt, I'm still not keen on the colours and don't want to make space for it on my walls.  SO if you would like it, please contact me or leave a comment.  If there is more than one person who'd like it I will draw a name out of a hat (probably at the end of the month).  It's about 19" square plus the dangly bit.

 I broke open the packet and started luceting.  This was the first bit.  At the bottom you can see the looser weave, then the tighter weave where I improve with the first method that I learnt.  Then there is a really wobbly bit where I tried to learn a second method, which straightens out enough for me to try to put a frogging line in, and then the section with the frogging.

It's going to be fun to try it with different types of yarn to see what happens, although I can only do a few minutes each day without making my fingers and wrists sore.

 This second photo shows a good step forward to what I want to do.  I want to be able to include beads (but clearly need to pay attention to counting to get even curves around the beads) and this is the easiest bead inclusion pattern that I've got.
On Tuesday I enjoyed a morning with two other Twickenham quilters.  Lesley allowed us to try out her Amanda Jane Pleater.  Amazing!  She gave us these lovely silk samples and I'm still trying to decide how to use mine.  They are very touchy-feely as you can move the pleats around to make pleasing shapes and forms.  I shall be interested to see what Avril does with hers.
And here is a photo of the hanging that I made last week for Kandy, now that I know that she's received it safely.  Similar to one that I made earlier in the year.


Finally, if you haven't already cast your vote, please take a moment to click on this page and vote for 'Unfolding the Quilts' to be a 'Best Heritage Project'. If the Quilt Museum (run by the Quilters' Guild) is the heritage finalist it will get a slot on a BBC show which would be great publicity.  It's already got and spent the lottery money, this is just a vote to say that it was a popular choice.

Sunday, 5 June 2011

Five minute lavender bags.

 When you get post like this - a lucet (cord maker - I haven't tried one before), some jewellery findings and a bag of dried lavender, it's hard to know where to start!

I decided to make some speedy lavender bags to calm me from the excitement of opening the post.  If you have the right things to hand, you can make them in under five minutes each, so a real crafting quick fix!
First I half filled an organza gift bag (you know the sort, just pennies each through eBay or other wrapping providers).  I was half tempted to stop at that point, until I remembered that the first thing that either of my DD's would do when they came across them would be to open them to investigate the lavender, and I might never manage to re-fill it!  So I carried on with Plan A!  A line of machine stitching to keep the lavender in place, then a swift swipe with a rotary cutter.  My bag was about 3" x 4" at this point, so I cut a piece of fabric 5" x 8" and hemmed one of the short sides.  Then with the right side of the fabric facing up, I folded the hemmed side just less than 1/3 of the way across the fabric, before repeating the fold with the unhemmed side.  All that was needed now was a line of stitching across what were now the short ends of the folded fabric.  Turn the bag back to the right sides out, slip in the lavender sachet, and you have the perfect item to grace your knicker drawer.  Of course, you could also spot that the left-over end of the bag looks a bit like a flower when you draw the ribbons up, and stitch that on and even add beads to the end of the ribbons for extra pizazz - but that might just be gilding the lily (or, in this case, the lavender).


I've only done two bits of 'real' sewing this week.  I made a wall hanging for an online friend, and also started my quilting group's challenge to start a 'sew a row' quilt.  Mine looks very pink and girly, but the orange should give it a bit of a lift.  If when I get to the end of making the rows (and it's going to average a row a month, I think) I decide that it needs sashing, I think that I'd opt for lime green, at least, if I had some on hand I would.
I hope that you've managed some happy sewing time too!

Saturday, 28 May 2011

Beach Huts

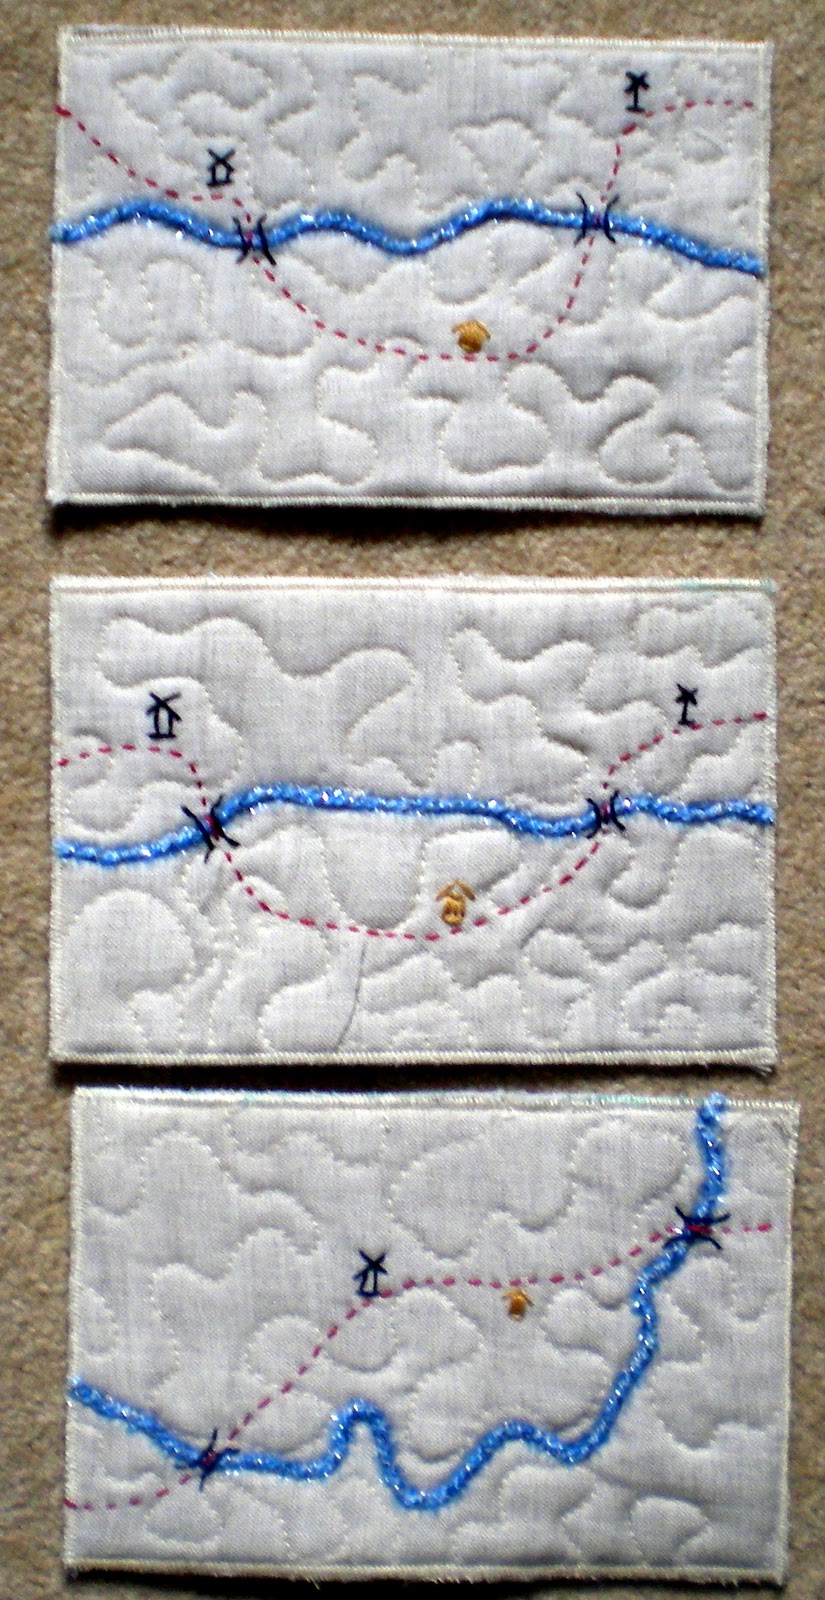
 The BQL May / June Challenge 2011 is to make a pair of 8" x 12" quiltlets that are obviously a pair.  I wanted to make a pair where scale was played about with - my first thoughts were a landscape piece (rolling hills, flock of sheep as white dots in the distance) and a 'close up' of one of the sheep.  Then I remembered my lack of drafting skills, and decided that I'd better try something simpler.

My second idea (pretty much, if I ignore the other 17 or so no-hopers that came in between numbers one and two) was to make a sketchy happy beach hut scene.  Think windmills, bunting and light illustration. 

So I started off.  I laid down stripey fabrics to look
like beach huts.  It looked all wrong (no photos of that bit!).Then I consulted my artistic gurus (thank you Nicky and Avril) .  OK. Distance shown by darker and duller colours.  I laid out more pieces and did the initial 'sketch' stitching to hold the pieces down and add a little detail.

Next I 'pebbled' the foreground shingle, and found that I couldn't shift the scale quite as I'd hoped, as my shingle wasn't significantly bigger on the RH piece.

 I decided not to worry too much about that, and used the same yellow thread with some brown thread (my first time using two threads through one sewing machine needle - yay!) to put in the next layer of beach.
Then another zig zaggy texture of just the brown thread. 
 All OK so far...


Moving further into the distance (and still chanting "duller, darker" to myself) I used the brown with some variegated olive green thread, starting to get the marsh grasses in.  Hang on.  Marsh grasses?  What happened to windmills, bunting, Punch and Judy and essential sunny urban beach huts?

Oh.  Yes, a quick look showed more like windswept Norfolk.  Perhaps I'd be getting my
 sheep in after all, just of the salt marsh variety.

I stop to reconsider.  And realise that a critical early marking line left my horizon almost exactly half way up the pieces.  Doh!  Even I've heard of the rule of thirds.  Time to trawl the thread drawer for more greens (duller, darker).  Hmmm.  Not exactly in plentiful supply.  I mix another variegated thread with the olive green and find that it's a bit bright and a pink in places...
 (and I've just misplaced the photo of that in Blogger, so won't have to show you that stage!).

 Time for the dullest green of all, some of it stitched over the brighter bits I'd just accidentally introduced.  Again I used two threads, but this time they were both the same variegated thread, and this time they caused more thread nests on the back than I would have cared for.  still, I had managed to move the horizon up the piece.


 Now to add some quilting to the sky.  I could perhaps have chosen grey or blue thread, but decided on white and windy swirls.


 Of course, by now, having quilted the pieces so heavily, they have shrunk.  I knew this would happen, so I'd taken care to quilt outside my guide lines, just a little, on every side.

Was it enough?  No!  I have to trim the pieces to 12" x 7 3/4" and hope that the narrow binding 'frame' will fill some of the empty unquilted space (and also not be too floppy).


 I decide to use the dull purple that I've used for the woodwork trim on the more distant beach huts to frame both pieces.  The colour fits the tone of the pieces and the tone of the dull, windy weather that we have in Twickenham at the moment. 

Initial ideas about colourful windmills and some bunting joining the pieces are thrown out.  It's not what I started out expecting to make.  If I'm honest,  if I'd known at the start that I wanted this much colour in the background I'd have laid down a fabric background rather than thread painting it.  On the other hand, I've never tried something like this before, so it was fun to experiment!

Bound, labelled, finished!


And this is just one 'detail' shot of the LH piece.  I'm not sure about the bucket and spade, but I quite like the spilt water!   I hope you've found my building process for these quilts interesting.  Perhaps you'll be inspired to go and play yourself, without worrying too much if the final product isn't quite what you had in mind!
PS If you head to Norfolk this weekend or next in order to look for salt marsh beach huts, make sure you leave enough time to go to Melton Constable to buy some terrific glass from Nicky Webb.  Norfolk Open Studios sounds great, but I have personal knowledge that Nicky's glass is super!


Wednesday, 25 May 2011

Merry, Merry Month of May!

Not, in fact, bunting for a May Fair, but more bunting for the St Marys school fair.  If you are around Twickenham on Saturday 18th June, please feel free to come along and join the fun (and look for me either fending off requests for more cakes or trying to slow down the rate of second hand book buying that my DDs are likely to indulge in).
Apart from that I have a couple of other projects that are in the 'pulling out fabric and wondering' stage, and that's about it.

So, if it's not sewing, what is making my May so Merry?  DD2 has been, after five weeks, released from her plaster cast!  Scary monster skin underneath, still bruised, but finally able to put her arm in the bath again and wear her full wardrobe without it being scissored first!  Hurrah!

Hope that you are finding space for your favourite way of spending leisure time.

Tuesday, 17 May 2011

Kindle Cover Tutorial

Just a quick run through how I made my Kindle cover.  I actually woke in the middle of the night and had a complete forehead slapping moment, as I realised that if using a directional print, the easiest way to make the cover (case?) would be to have the opening flap on the long side, rather than at the top.  Doh!  I may make a Mark II case to demonstrate this.....  but at the moment you will have to manage with this top opening cover instead.

Kindle Cover with slim pocket.

1) Cut out three sets of fabric.  
     Back of case (inc flap) -  6 1/2" x 12 1/2" -  outer fabric, lining fabric and wadding. (if you are making this version in directional print, ideally you would make your piece of outer fabric from two pieces of fabric - one 8 1/2" and one 4 1/2" sewn together with a 1/4" seam with the prints having their 'heads' meeting so that when the flap is closed the print will all look correct).
     Front of case - 6 1/2" X 8 1/2" - outer fabric, lining fabric and wadding.
     Pocket (optional) - 6 1/2" x 8" - two pieces of lining fabric. (I wanted a pocket for the cardboard 'idiots guide' that came with the Kindle.

2) Layer up each set with right sides of fabric facing each other and the wadding, where used, on top.  Pin if you are feeling nervous, although they are small enough not to really need this.

3) On the flap end of the largest set, either mark out a diagonal line (I marked 2" down and across from the corners, but you could use a small glass to make a rounded shape, if you'd like).  This will give you a nice shape for the flap.  Now is also the time to insert your piece of elastic (or hair bobble. or longer bit of ribbon to twizzle around the button to hold the case closed).  You need to make sure that the 'working' end of the loop is between your fabric / lining layer where it will pop to the right side when you turn these pieces out, and that you are going to sew over the ends when you make your seam.  I like to knot elastic or ribbon to make doubly sure that it can't escape from the sewn line later.

3) Sew around each of the three sets with a 1/4" seam, starting at what will be the bottom of each set of fabrics and finishing approximately 2" from where you started to leave a 'turning gap'.

4) Snip diagonally across the corners (taking care not to snip your stitching!) to get rid of the excess fabric - it will lead to a neater corner when you turn it through.

5) Turn the three pieces right side out and press (or finger press) the edges to make them tidy, paying careful attention to the seam allowance where you left the turning gap.  If you would like to lightly quilt your case, this is your moment to do it.


6) Layer up all three pieces with the bottom edges matching, the back should be on the bottom, right side down, then the pocket, then the front, right side up.

7) Stitch the pieces carefully together, using a scant 1/4" seam.  I would start at one side of the opening, go around the front piece (where the stitching will hold the back, pocket and front together) and then continue around the flap, where the stitching will be purely decorative.

8) Nearly finished! Choose a button, insert your Kindle and mark where the button will need to be sewn.  Sew it on taking care not to sew the pocket closed too!

9) Sit back and admire your new cover (and ignore the small matter that I didn't take my own advice about making the two-part back to the case, so my flap is 'upside down'!).

Happy Chickens!

I shared the lovely tute from Myrtle and Eunice with some gal pals (not sure that I like that phrase, but it sums up who they are!) last night.  These were my trial chooks, all with different gauge wire legs as I tried to find one that I could manipulate and that would be strong enough to support these little lovelies. 


And here are the motley crew of chicks assembled at the end of the evening.  They all have their own characters, and most of them are going to need to have a good chiropodist in the not too distant future!

Wednesday, 11 May 2011

My week so far.

I haven't been awfully productive this week, but I have enjoyed what I've done, and I'm happy to share it!  I've also got work from other people to share too....

 
 First of all I thought I'd show you my completed cushion cover, using the Jacquie Harvey workshop piece.  I added a couple of rows of additional stitching using the same perle thread that I used for the french knots in the middle.

The border fabric was from my stash - and is a great colour match for the water colour inner ring and the perle thread.

This is my other finished make this week - a Kindle case.  I used some lovely text fabric given to me last year by Avril - thanks, Avril!  I'm planning to show a quick tutorial for this later in the week, just in case someone else wants to make one.  Despite my DS suggesting that I make a pocket for the cable, as my Kindle usage is likely to be 'ballet mum' style use (waiting for DDs to finish various clubs or lessons) I made a case that is quite light, and which doesn't have space for cable / plug, but which will repel biscuit crumbs and apple pips which inevitably form part of my luggage when toting snacks, entertainment and ballet kits about! 
Avril also ran a workshop at my local quilting group to demonstrate 3d windmills, which was an enjoyable chance to sit and stitch and chat.

Talking to Avril and another quilting friend, I was struck again by how enjoyable they are finding their textile courses.  I love the idea of taking a C&G course like this one, I was quite interested in the course run by the Open College of Arts, but I'm not sure that I'm quite ready to take the plunge yet.  It's not that I wouldn't enjoy it, just that I don't know if I've got the energy to do it.  Perhaps I'll wait until the DDs are a little older, although I'm not sure that they will take any less of my energy then!

 
I've got two more things to show you.  First of all this lovely quiltlet from the BQL challenge, made by Wendy Weller.  It's beautifully made and the perfect colours for my DDs' room, (the colour scheme of which was based on my memories of Jervis Bay, NSW, Australia - just look at the photo on this page to see what I'm talking about!).

The other mini work of art was one that I forgot to show a week or two ago - a lovely postcard from Benta - thank you!

Now, I'm not sure if these photos are going to come out in quite the right place....for some reason Blogger is being a bit awkward about positioning them!

I hope that you have a great week of sewing or crafting.

Wednesday, 4 May 2011

Quilt and quilt again.

 Now that the girls are back at school (OK, just for two days, then a day off when the school turns into a Polling Station before we get back to usual) I've made good inroads into a couple of small quilting projects.

This is the April stay at home round robin - the quilting stage.  It doesn't show on this photo of the whole piece, so I've shown a detail shot of the house.  I've quilted each block differently, and it was fun to do.  My biggest challenge was choosing a thread colour.  I'm not fond of changing threads frequently (or at all, if I'm honest) but I didn't have a variegated thread that had the colours of this quilt in.  I felt that my best options would be either a grey or a golden brown.  I chose the golden brown in the end, and I think that it was the right choice.

I also cut the piece into it's final wobbly shape.  I think that it's going to need a bias binding for the edge, rather than the straight cut that I would usually use.  This month (May) is another chance to add embellishments - I need to re-add the rose and beads that were just pinned on, but I'm not sure that something else wouldn't just be gilding the lily!

  And this project was finished (with several questions from DD2 about just how long I could spent sewing one tree).

Here the tree is with the marking / re-marking (I'm not sure that marking the cross hatching after the initial back stitch quilting is the best way forward for me - I managed to go wrong, damp down that area, but then had the dampness travel about the cloth and start moving ink from the other lines too - it looked very messy!).

I really need to learn how to tension the piece better - without using a hoop which I don't fancy.  Even on this piece (started 12" square, finished 11" square) I had to put a pleat in it.....perhaps I should just stop trying to work on whole cloth quilts, even this tiny, and concentrate on piecing!

 This is how it looked after a thorough rinsing in water.  At least the 'wash away blue' came out, and hadn't been heat set by the warm weather that we'd had.

I smoothed it out on a towel to dry, but didn't need to block it to get it to lie flat (just that one pleat, then, no more).

And here it is in  it's almost finished state.  I've added a batik border and machine quilted it.  Although I think that it would have been nice to hand quilt it, batiks are so closely woven that I think it would be too painful.

I did keep the spacing the same, though.  So 1/4" between the concentric squares, just like the hand quilted filler behind the tree.

I rather imagine that this will become a cushion cover - and then be given away!

It's been fun to do, and I can see that my quilting could improve if I carried on working at it.  I've started another hand quilting piece but will probably take my time over this one.

Now it's time to draft a couple of design possibilities for a school leaving present for a member of staff....trying to get a balance between something that the children can join in with, but that won't be too labour intensive when it comes to the construction.  I've got lots of ideas, but not sure how they could best be implemented!

Monday, 25 April 2011

Quick and Dirty!

Not much sewing over the last week, but I've finally taken a snap of the 'camp blanket' that  I made for DD1's Brownie camp fire excursions.

It really was 'quick and dirty' techniques at their finest.  A large (and lovely) Laurel Burch mermaid panel for the centre (what a lovely present that was from her Aunty Nicky), simple maths to add panels for badges to be sewn to, and then a forgiving border which also wraps around the edge to become the binding too.  Each part 'stitch and flipped' onto fleece, with a couple of extra lines of 'quilting' across the mermaid panel to stop it from shifting.  No more than two hours from idea to completion, as I was able to 'shop my stash' for the fabrics and the fleece backing - and that was with DD2 'helping' me as she was off school that day!


Now, of course, I'm after a similar - but different -  Laurel Burch panel piece for DD2's blanket.....

My other 'quick fix' was to not learn how to draw out marvellous quilting designs in Quilt Pro, but instead to purchase a loopy tree design from Urban Threads and trace it using wash-away pen.  Much quicker, but I am a little concerned that the hot weather might 'set' the pen.  I really didn't envisage summer temperatures so early in the year.  I will get around to original quilting designs at some point, but I knew that I only had limited time to set up some hand quilting, and that the drafting stage wouldn't be a fast one for me!

I'm back-stitch quilting it over lambs wool wadding and butter muslin backing - and it feels lovely and soft.  I've actually made more progress than this shows, but forgot to take a photo of it.  It's going to be around for a while, though, so I'll post another picture later in the process.

Friday, 15 April 2011

Quilting on the run

Does anyone else feel that time is rushing past?  I can hardly believe that it's Friday - or that we are half-way through April!

I've done some lovely quilty things this week.


First came a hand quilting / water colour pencil technique workshop with Jacquie Harvey.  I loved seeing her work - the miniatures were truly astonishing - but the workshop piece that I'm making doesn't feel very 'me' - despite by best attempts at brightening up the colours to suit me better!   I'll be happy to finish it and make it into something for someone else to love, though.  For me the best bits of learning were to do with the materials that Jacquie herself uses.  I've indulged in a little retail therapy and bought some wool batting and butter muslin for the backing, and will use some of the cotton sateen that Avril bought us to try some more hand stitching.  I will also investigate how to produce my own quilting patterns in Quilt Pro, as I'd like a speedy but unique way of designing (although I might have to go back to free hand drawing, photocopying and glue sticks - I'll see!).

Then my friend Benta came to tea, on her way to RKQ as a visitor for our April meeting.

The meeting was a fascinating talk by Maggie Rowell - one of the two Fabric Freedom designers.  She was not only both interesting and entertaining, talking about taking a fabric range from an initial idea through painstaking painting to the printing process and on to selling the fabrics, but also very generous.  She had brought a large selection of fat quarters for us lucky listeners to share and then, perhaps because she'd spotted (purely by chance!) a Fabric Freedom print in one of the baby quilts that I'd given to Jenny's husband's foster charity, she gave me a whole Stripper roll, entitled 'In the Pink'.  Well!  I could hardly believe it!  I see more lovely charity quilts being made in the future, and I'm wondering if I could do something for the Children's Hospice that she supports - Shooting Star Chase.  I will have to contact them to see if they accept donation quilts at all.

I'm still slightly star struck as I realised that she was one of the designers of one of my favourite fabric ranges, Coloured Dreams......

I also chose three Christmas FQ's - they will be perfect for making some demonstration 'Christmas Chickens' (not sure why they aren't turkeys, perhaps that's only if they don't turn out well) for the workshop at RKQ later in the year.

All the excitement plus having the girls at home for the school holidays has rather meant that my sewing time has been curtailed, of course.  The casualty is 'Super Nova' which is distinctly lacking star quality at the moment.  I am now more than two weeks behind the quilt-a-long!  Still, I've got an unexpectedly free day on Monday (a silver lining as a Tuesday hospital appointment means that I won't be setting off for the New Forest with the rest of the family) and I will see what I can accomplish then.

Hope that you are all preparing for a lovely Easter break.

Wednesday, 6 April 2011

Playing Catie Catch-up!

I think that the idea of a quilt along is that you do things at the same time, more or less, as everyone else in the group.  So having joined the Super Nova quilt along, and knowing that the next set of instructions would be given each Thursday, you' d have to wonder why I didn't finish the first weeks task (cutting) until the Sunday AFTER the second set of instructions were given out.  Then you'd have to wonder why I didn't catch up and manage to finish the sewing today, so that I was ready for the instructions tomorrow.....which will be my last child-free (thus offering most sewing possibilities) day for another two and a half weeks.  Even with deciding to sew without ironing (not something that I'd usually do with half-square triangles) to speed things up I only managed to produce three out of the nine sets of blocks.  Oh well, I'll just have to see how I get on tomorrow!

I am just wondering where the time went!

Admittedly I have finished another couple of projects this week.  I've made some map based post cards and ATC's (ahem, oh yes, not all of them edged yet, I remember). 


And I finished this little baby quilt.  With interesting quilting....  I decided to follow an idea that I'd read some years ago about following outlines on the backing fabric to quilt.  I liked the idea, but it turns out that the rows of scooped icecream (like the centre star, I used the same fabric for the backing) weren't quite as clear to follow as one might have thought....so near the bottom it all gets a bit skew-whiff.  I think that I might have to frog stitch (rip-it, rip-it) and re-do it!  Apart from that I liked the idea, and was able to space the quilting so that it wasn't too close together to make the quilt too stiff.


Other fun things this week were jewellery making with some girl friends.  I introduced them to the delights of tiger tail (a nylon coating metal wire) and crimp beads - a combination of materials that I really, really like, and probably the favourite thing of mine that I learnt about on my jewellery course last year.  Unfortunately I forgot to take pictures of the earrings and bracelets that I made before giving them away.  Never mind, I'm sure that there will be more made in the future.

Hope that you've got some lovely spring projects on the go too.